An End Brings A New Beginning
After having spent the last 7 years as an artist, I was starting to re-evaluate why it was that I got into the industry in the first place. At Threewave Software, I was given a lot of insight into the design of FPS games, and learned a lot about player pathing; such as landmarking important path locations with unique objects and designs, and using metrics for building worlds. I always knew that I wanted to be on the design end of games, and being laid off from Threewave Software provided a unique opportunity for that dream to become reality.
I chose an engine called Multimedia Fusion to start with and began with some paper designs for a turn-based strategy game. However, shortly after I began I learned that I would soon be having a son which tossed a wrench into my plans. After spending some time brainstorming simple ideas, my wife suggested turning to my other passion: board games. I have always had a love for board games, and a turn-based strategy game could easily be a board game.
First I thought about the world and the story. I imagined what it might be like, if there were anything magical and fantastical about this place, and how the story would tie into the game mechanics.
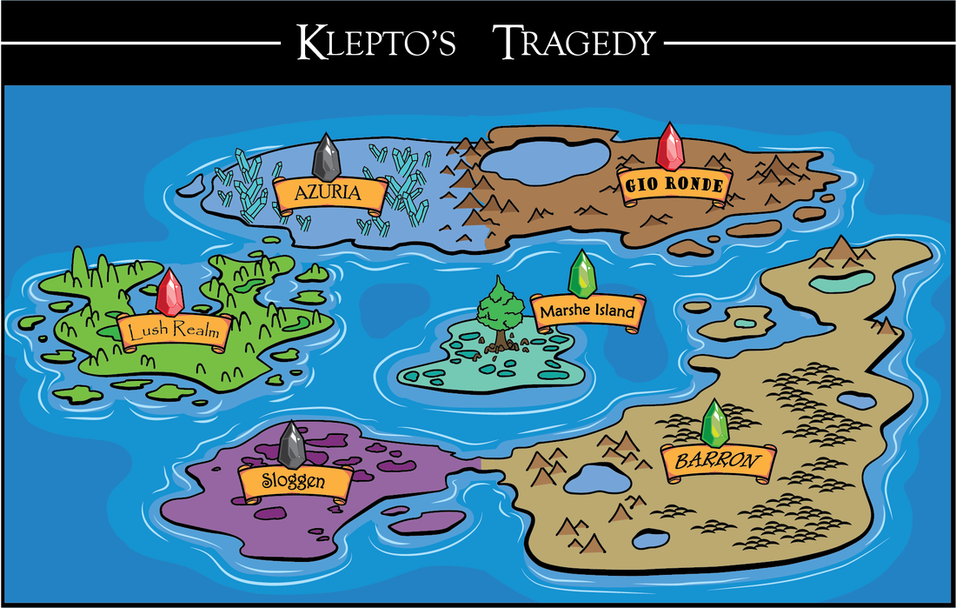
The World Map of Klepto's Tragedy. Each Kingdom has specific terrain and unique objects.
This fueled my thoughts for what the rest of the game would be like.
This fueled my thoughts for what the rest of the game would be like.
Kelpto's Tragedy
The story is really a product of simple character sketches and imagination. It started out with a few ideas about what the societal structure of this world might be and as most fantasy fiction I decided it would be ruled by a King. Of course, with any story about a King, corruption quickly follows because its interesting and relatable as human nature. And so, this King, who was once a man of honor and duty became corrupted through the discovery of something supernatural and unexpected: an entry-way to another dimension.
The King enlisted his sorcerer, Klepto, to investigate the anomaly. He'd promised him anything he required to find out about it, and that's exactly what the Sorcerer did. Quickly, he discovered that objects could pass through it, never to return. This gave him the idea to start sending birds and dogs through the anomaly, who also did not return. He came to the conclusion that he must send a human to truly discover what it was.
The King allowed Klepto to use his prisoners to experiment with humans, of which none returned. This fascinated the King, and soon, he was sending anyone who opposed his laws through the anomaly. It wasn't long before things got out of hand, and the people began to fear him as a dictator.
All good things must come to an end however, and one such day did indeed come for the King. His own wife had broken his laws, and in front of all who kneeled to him he was forced to abide by them; to condemn his wife Kariola to the anomaly. The people loved the Queen. This created an uprising that resulted in the Throne being overthrown. Just as the Queen before him, Klepto was forced into the anomaly by Kelpto. He thought he was finally free from the tyranny of the King, but the rebellion also forced Klepto through the Anomaly.
Klepto would finally learn first hand that the anomaly was not only a gateway to another dimension, but also a transmogrification of the flesh. He felt paralyzed as his flesh twisted and pinched and pulled itself into a new form. It felt as though there were sticky fingers kneading through his mind to discover his deepest, darkest secrets and stretch them to the surface and personify them.
Once he became conscious in the strange new land, all he could think about was the image in his mind of a golden key. Soon, he heard the voice of Iris: "Return my key to the Portal, and you will return to where you came from." From this point onward, it would be a battle to the end for the Key of Iris.

The first 7 Characters for the game
Building The Game
After coming up with the core mechanics I decided it would also be a great way to showcase my artist abilities, so I spent some time thinking about how to construct a board game. It wasn't long before I settled on the idea of papercraft. I'd made games out of paper before and this would be no different... I just had a lot more skills to factor into the equation.
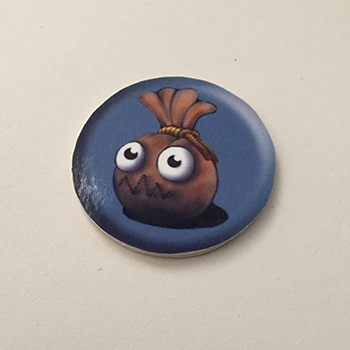
I started out by modeling two of the characters in Maya, and printing out the UV's so I could cut them out and put them together. Anax and Blobby were the first on my list, because I wanted to do two different types of characters, one that was primarily circular and one that had a lot of strong edges.
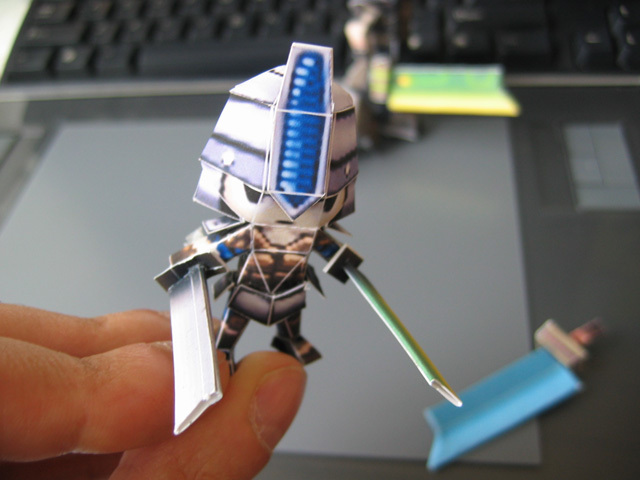
King Anax
|
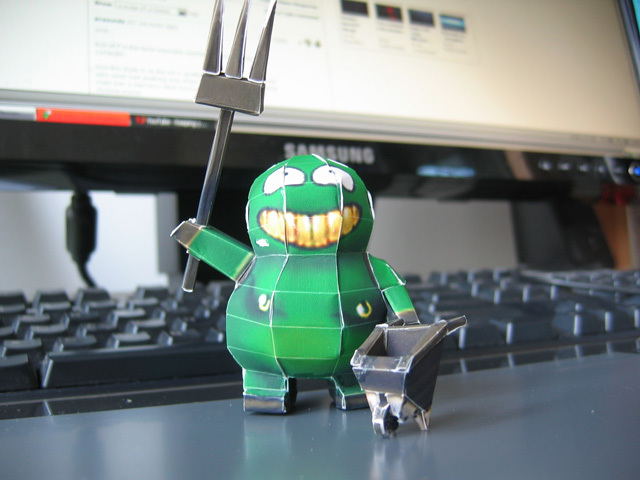
Blobby
|
I quickly learned that the size would greatly impact the amount of time to create it. I didn't want to do simple papercraft like I'd seen so many sites like Kotaku posting news about - it had to be something that would grab people's attention.
So I went shopping for supplies and bought some high quality paper and tools to better cut/piece the characters together. I also decided to prototype some simpler characters to speed up the process. The process was quite lengthy since I was doing it all alone, but I had so much fun doing it, that the time went by faster than I expected.
My process ended up being:
- Concept Character
- Model
- Lay out UV's
- Texture
- Lay out for print
- Slice
- Fold and glue
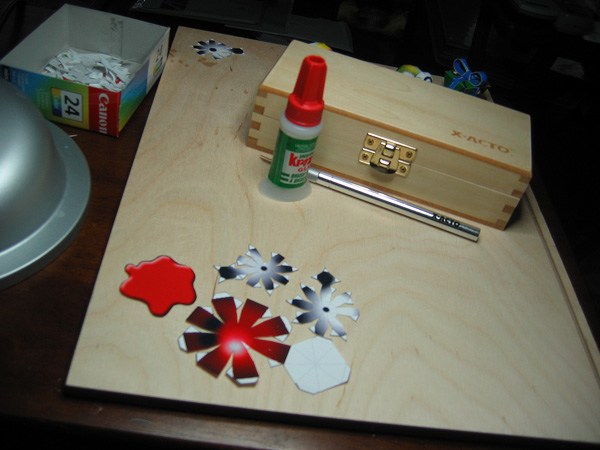
I used X-acto knives to slice out the paper
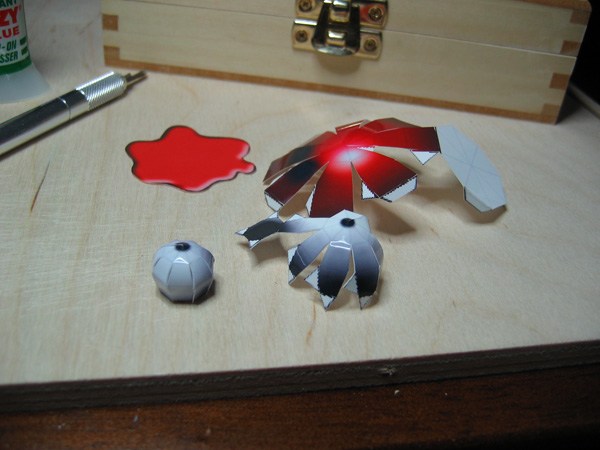
and tweezers with super glue to glue everything together
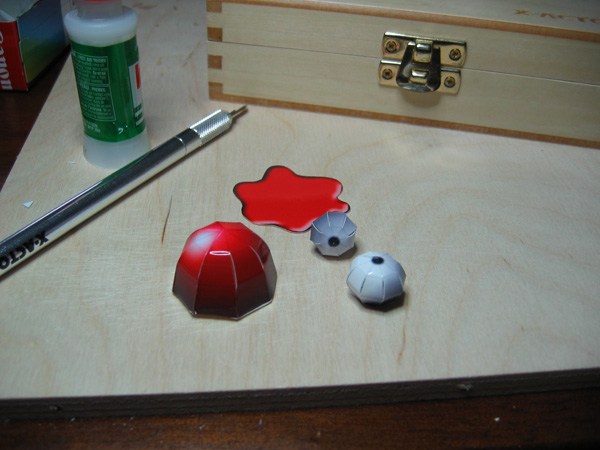
after the components were glued, I pieced the model together to complete it
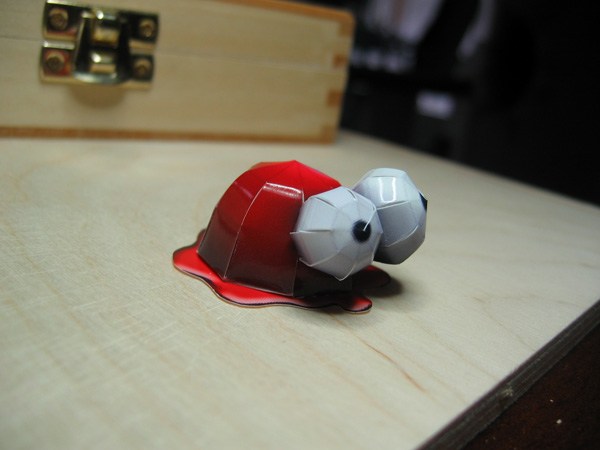
The photo paper proved to be a lot more professional looking and durable as well
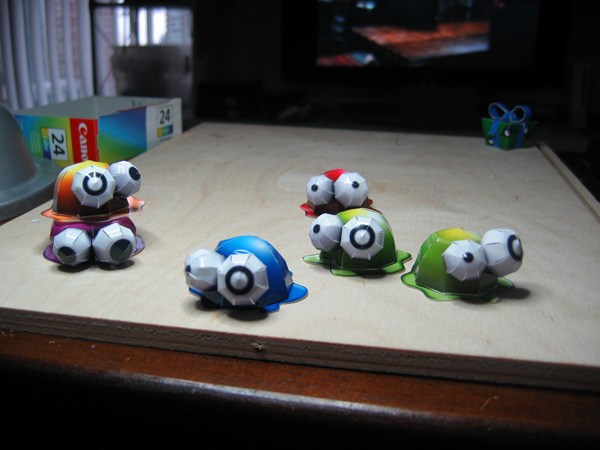
In an afternoon I'd build all the slimes I required for a prototype of the game
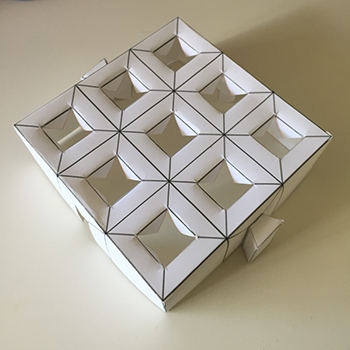
After bringing an army of Slimes to life, I decided to continue focusing on the first batch of world pieces. This involved figuring out how they would fit together, as I envisioned everything about the terrain to be modular. The best board games I'd played all featured modular world building - it allowed a unique experience every time the game was played.
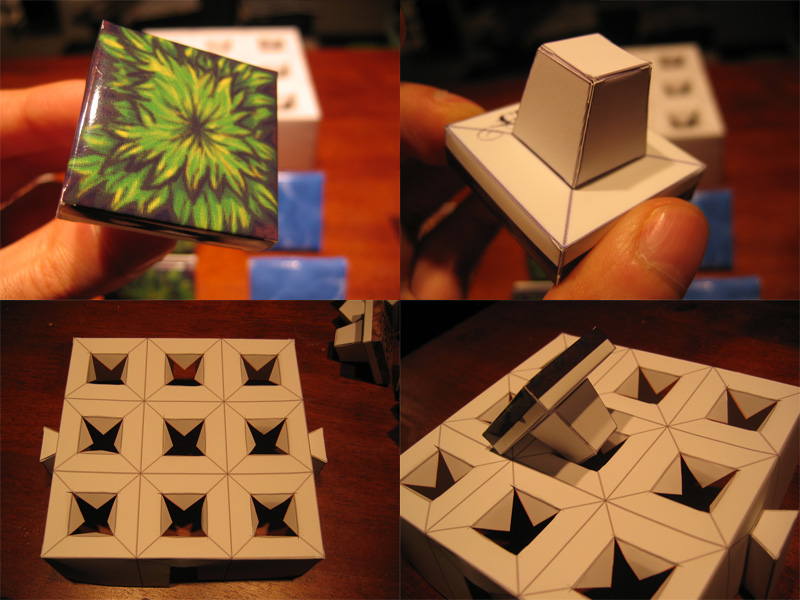
A terrain tile and a world shell
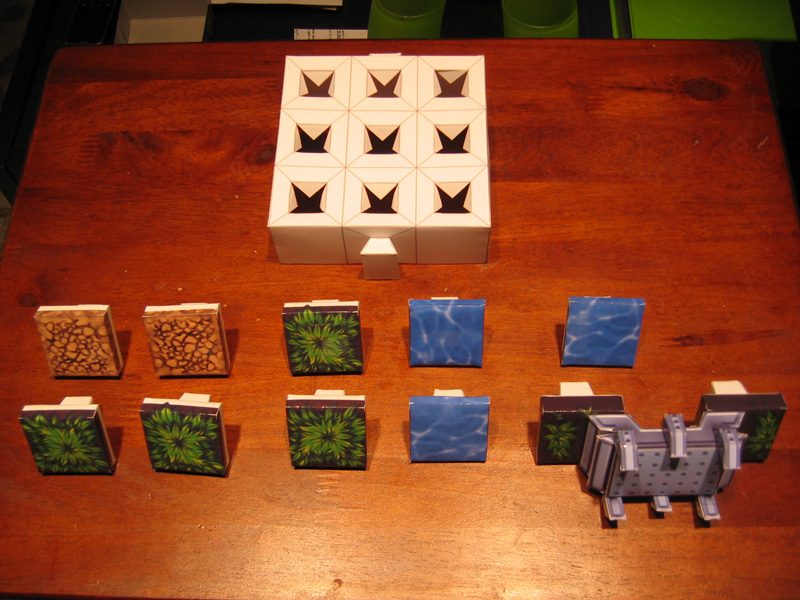
The amount of pieces required to fill a world shell, including a bridge
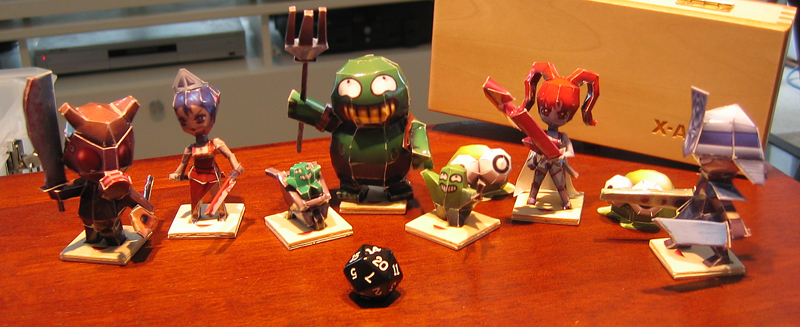
It wasn't long before I'd built the initial cast of playable characters and enemies
From this point on, it was time to focus more heavily on the documentation for how the game would be played. After several rounds of playtesting with friends and family I had arrived at a ruleset that many people were having fun with. The game could be played in 15-20 minute sessions with up to 4 players, and everyone could easily understand how to win the game. The rest was the fun in how to win the game.
Playing The Game
Setting up the game for a Character Only game is done in 5 simple to understand steps. This mode is called Junior Game. When including monsters on the Maps, the mode becomes an Advanced Game and requires longer to set up and play. It is recommended for first time players to play the Junior Game to learn the game mechanics and the flow of the game.

First thing to understand is how many people are playing. The game can be played with 2 - 8 people. The time required to play is longer depending on how many people are playing, but a 4 player game typically takes about 20 minutes start to finish.
Choosing Pieces
|
The Map must be built by all players playing the game. Before anything can be built, players need to know what they need to build with. Maps are constructed from World Shells that contain World Tiles. World Shells are all the same, each can fit 9 World Tiles. World Tiles can be many different types of Terrain and each of them can affect the player in different ways. Players must also choose their desired load-out; 5 Item Tokens. These can be used as they are found and benefit the Player in some way. Lastly, every Player needs an Avatar, which are all unique in their own way.
The game also requires:
|
World Shell
|

World Tile
|
World Object
|
Item Token
|
Avatar
|
Turn Order

|
After everyone has chosen their pieces, Players use a D20 to roll for Turn Order. This is important because the rest of the setup requires Players to take turns building and populating the Map. The higher the amount of people playing (maximum 8) the longer the setup takes, and the longer it takes to play the game.
In a Junior game, the highest roll is the first Player, and Players take turns clockwise
In an Advanced game, the highest roll is the first Player. The Player that is to the left (or counter-clockwise) to each Player is considered their Adversary. Players take turns in clockwise direction.
|
Map Building
|
After the turn order has been determined, it's time to start building the map! First the World Shells must be placed and connected. The only rule about World Shells is that they must all be connected, they can be placed in any way. Players take turns placing and connecting the Shells one at a time.
After placing and connecting the World Shells, it's time to place the World Tiles. Just as with the World Shells, Players place one tile at a time on either of the 2 World Shells they initially placed. Players continue to place World Tiles until every World Shell is full.
After placing the World Tiles, Players can place their World Objects one at a time until they have both been placed for each Player. World Objects cannot be placed adjacent to each other.
|
Place Tokens
|
Placing Tokens is different than World Building. Each Player puts Tokens into a pile:, which we call the Loot Pile
Before Players start to put their unique Tokens into the game, put a Key of Iris and a Portal into the Loot Pile.
Next, Players take turns taking Tokens and placing them face-down in a separate pile.
Tokens, like World Objects cannot be placed adjacent to each other. They also cannot be placed on any corner of any part of the Map, as those Tiles are reserved for Avatar Placement. They can be placed on World Objects that allow it, such as a Bridge, or a Carry Slime.
|
Place Players

|
Placing Players is the last step. Player Avatars can only be placed along the outside corners of the Map, They also cannot be adjacent to any Tokens. Each Player places their Avatar in proper turn order. When all have been placed, it is time to collect a Parting Gift!
|
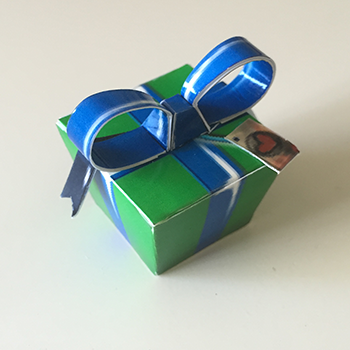
Parting Gifts

|
Before the game begins, each Player must also claim their Parting Gift. Each Player once again rolls the D20. The lowest roll gets to choose the first of the remaining item tokens (which should be equal to the amount of Players. Once each Player has acquired their Parting Gift, the game can begin!
|
The First Turn
Before we can understand the Turn Order and how to take turns, we must first understand Universe Direction. This can easily be thought of as Night and Day. All Characters have two sides to their cards, a Truth side, which is white in color, and a Tragic side, which is dark in color. When the Universe Direction in Truth, Players must refer to the details of the Truth side of the card. When the Universe direction is Tragedy, Players must refer to the Tragic side of the card.
Since the Map Building was all done in the proper turn order that was initially rolled, it would only make sense to once again give equal opportunity of chance to all Players. Everyone rolls the D20 to determine a new Turn Order. Once the Turn Order has been established, it remains until the Universe Direction has passed from Truth → Tragedy →Truth. At the start of the second Truth, Players roll for Turn Order. This continues until the game has concluded.